

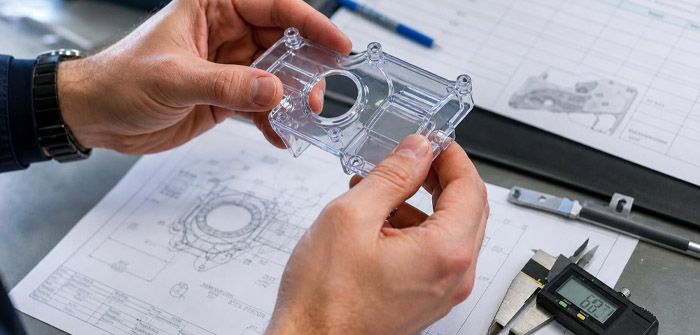
The manufacturing process you choose for a plastic part affects a lot more than the initial price tag—it shapes product quality, lead time, design flexibility, and how easily you can scale production down the road. Many teams researching plastic injection molding for businesses quickly realize it’s only one of several viable production routes, and the right fit ultimately comes down to part geometry, material requirements, production volume, tolerances, and intended use. This article lays out a practical framework for comparing processes before you request quotes or lock in a design, so decisions can be based on evidence rather than guesswork.
Start With the Part’s Requirements
Before comparing manufacturing methods, figure out what the part actually needs to do. Choosing a process based on price alone, without first understanding functional requirements, tends to lead to costly redesigns later.
Document these requirements early:
- Mechanical loads and impact exposure
- Operating temperature range
- Contact with chemicals, moisture, or sunlight
- Dimensional tolerances
- Surface appearance expectations
- Assembly and fastening needs
A cosmetic housing has different priorities than a structural bracket or a one-off prototype. Material properties and environmental conditions directly affect shrinkage, warping, durability, and dimensional stability over time.
A few terms worth knowing: tolerance refers to the acceptable range of variation in a dimension; shrinkage describes how much a material contracts as it cools; draft angle is the slight taper added to vertical walls so a part releases cleanly from a mold; and cycle time is the total time needed to produce one part.
Compare Common Plastic Manufacturing Processes
Injection molding involves melting plastic pellets, injecting them into a mold cavity, cooling the material, and ejecting the finished part. It’s often the go-to choice for repeatable parts and larger production runs, since tooling delivers consistent output once it’s dialed in. Design considerations include uniform wall thickness, adequate draft angles, rounded internal corners, properly sized ribs and bosses, and careful handling of undercuts, which can add tooling complexity. Mold costs can run high upfront, even as individual part costs become more predictable at scale. Applying design for manufacturability principles early helps cut down on defects and unnecessary complexity.
CNC machining removes material from a solid block or sheet using cutting tools. It works particularly well for prototypes, low-volume runs, tight-tolerance features, and parts made from engineering-grade plastics. The trade-offs include material waste, certain geometric limitations, and higher per-part costs once volumes climb.
3D printing builds parts layer by layer, making it well-suited for rapid prototyping, customized parts, and complex geometries that would be difficult to mold or machine. Its limitations can include surface finish quality, uneven strength depending on print orientation, slower production speeds, and material constraints tied to the specific printing technology in use.
Thermoforming, rotational molding, and compression molding each serve more specialized purposes. Thermoforming suits thin-walled packaging and large panels; rotational molding works well for large hollow parts like tanks; compression molding often fits high-strength or heat-resistant applications. No single method wins across the board—each addresses a different combination of geometry, volume, and material needs.
Evaluate Volume, Cost, and Lead Time Together
Total project cost involves more than the quoted unit price. Consider:
- Up-front tooling or setup costs
- Per-part production costs
- Finishing and assembly costs
- Inspection and packaging costs
The lowest initial quote doesn’t always translate to the lowest total cost of ownership. Production volume shifts the economic balance considerably—machining may be the more cost-effective route for dozens of parts, while tooling-based molding pulls ahead at higher quantities. Lead time estimates should account for design review, prototyping, tooling fabrication, production validation, inspection, and shipping.
| Factor | Injection Molding | CNC Machining | 3D Printing
|
| Tooling investment | High | Low to none | None |
| Repeatability | Very high | High | Moderate |
| Scalability | Strong at volume | Limited at scale | Limited |
| Design flexibility | Moderate (mold constraints) | High | Very high |
Key takeaway: The right process depends on the part’s specific requirements, not simply its expected production quantity.
Assess Quality and Risk Controls
Define measurable acceptance criteria before production begins. Review dimensional inspection methods, material certifications, first-article or pilot-run procedures, process documentation, defect-reporting practices, and change-control procedures.
Common molding-related defects include warping, sink marks, knit lines, and surface blemishes—often traced back to process variables like temperature, pressure, cooling rate, and holding time. Verify technical claims against material datasheets, applicable standards, engineering drawings, and independent inspection results rather than taking a supplier’s word for it.
Review Supplier Capabilities Objectively
Evaluate potential manufacturers using a neutral checklist:
- Experience with the required material and geometry
- Available equipment and production capacity
- Engineering and design-for-manufacturing support
- Quality-management procedures and traceability
- Communication and issue-resolution processes
- Demonstrated ability to support expected volume
Ask for process explanations and sample documentation rather than leaning on testimonials alone. Confirm ownership of tooling, drawings, CAD files, and molds in writing. When comparing proposals, use identical specifications across the board so the evaluation stays fair.
Use Prototyping and Testing Before Scaling
Prototypes surface assembly problems, ergonomic issues, and manufacturing constraints before you commit to expensive tooling. Appearance prototypes test visual and tactile qualities; functional prototypes test performance under realistic conditions—load testing, temperature exposure, chemical compatibility, repeated cycling, and dimensional inspection.
Prototype before scaling whenever possible. Consider a hypothetical scenario: a design team building a housing component skips functional prototyping and jumps straight to tooling. During production, they discover an overly thick wall section causing sink marks and a missing draft angle that prevents clean ejection. Reworking the mold ends up costing far more than catching these issues during an early prototype phase would have.
A staged path typically looks like this: initial design review, prototype, design revision, pilot production, validation, and full production.
Prepare a Practical Decision Checklist
Before choosing a process, document:
- Intended use and performance requirements
- Annual and initial order quantities
- Target material
- Required tolerances
- Surface-finish expectations
- Prototype needs
- Compliance requirements
- Budget and delivery constraints
Request quotes using identical technical information, and ask manufacturers to spell out assumptions, exclusions, minimum order quantities, tooling maintenance responsibilities, and rework policies.
Final Decision: Match the Process to the Product
Process selection should balance performance, volume, geometry, cost, quality, and future scalability—no single method fits every plastic part. Material compatibility and quality acceptance criteria need to be defined early, not discovered mid-production. Validate designs early, bring in qualified technical professionals for safety-critical applications, and base final decisions on documented evidence rather than marketing claims.
Before committing to tooling or production, put together a written requirements brief and compare suppliers using identical specifications. This one step often saves a lot of costly misalignment later in the process.